Unleash Your Creativity with Decor Materials
When it comes to making your sweet boxes stand out, the sky’s the limit with creative decor materials. So, grab your crafting supplies and let’s dive into a world of endless possibilities!
**1. *Glitter and Sparkle Everywhere*
Let’s start with the absolute favorite of all things dazzling – glitter! Whether you’re going for a glamorous, fairy-tale look or adding a touch of pizzazz to a simple box, glitter is your go-to material. Go wild with gold, silver, or even rainbow-colored glitter for a dazzling effect that will make your sweet boxes shine brighter than a disco ball!
But remember, while glitter adds magic, it can also create some mess. To keep the sparkle contained, consider using glitter adhesive or sealant to lock it in place. Your customers will appreciate the glittery surprise without finding specks of it all over their goodies.
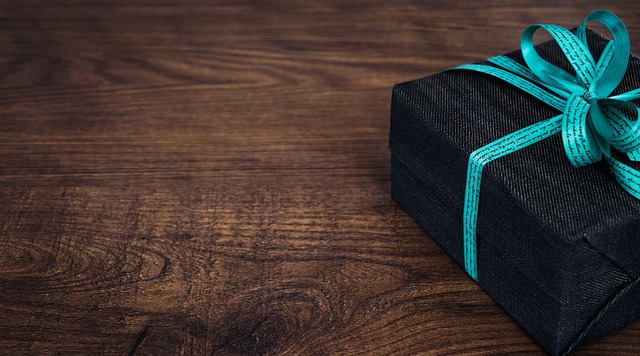
2. Ribbon and Lace: Elegance at Its Best
Nothing says elegance quite like ribbon and lace. These timeless decor materials add a touch of sophistication to any sweet box. Play with different colors, textures, and widths to match your theme. Satin ribbons exude luxury, while lace gives off a vintage, romantic vibe.
To create a charming effect, try combining ribbons and lace in complementary colors. You can tie a delicate lace ribbon around the box and add a bold satin bow on top. The result? A sweet box that’s ready to steal the show at any event!
3. Stamps and Personalized Touches
Want to add a personal touch to your sweet boxes? Stamps are your secret weapon. You can use custom stamps with your logo or special messages to create a unique, branded look. Stamp directly on the box or onto a piece of paper or cardstock that you can attach.
But don’t stop there! Experiment with different ink colors and textures. Metallic inks give a luxurious feel, while watercolor inks create a soft, artistic impression. This personalized approach shows your customers that you care about the little details, making their unboxing experience truly special.
4. Natural Elements: Bringing the Outdoors In
If you’re going for a rustic or eco-friendly look, consider incorporating natural decor elements. Think twine, dried flowers, or small wooden embellishments. These materials add a charming, organic touch to your sweet boxes.
Imagine a sweet box adorned with a sprig of lavender or a small wooden heart – it’s like a piece of nature wrapped around your treats. Plus, it’s a subtle way to show your commitment to sustainable packaging, which eco-conscious customers will surely appreciate.
5. Washi Tape: Colorful and Versatile
Washi tape is a game-changer in the world of decor materials. It’s colorful, easy to use, and comes in an endless array of patterns and designs. You can use it to create borders, patterns, or even cover the entire box for a fun, vibrant look.
The best part? Washi tape is easily removable, so you can experiment and change your box’s design as often as you like without leaving a sticky mess. It’s like giving your sweet boxes a wardrobe of their own!
6. Fabric Scraps: Texture and Charm
If you have leftover fabric scraps from other projects, don’t toss them – use them! Fabric adds texture and charm to your sweet boxes, making them look and feel unique. You can wrap the fabric around the box and secure it with a ribbon or glue it for a more permanent design.
Fabric scraps also allow you to play with patterns and colors. Mix and match fabrics to create a patchwork effect or choose a single fabric that complements your event’s theme. It’s a budget-friendly way to breathe new life into your packaging.
Creating Stunning Sweet Box Decor: A Step-by-Step Guide
Decorating sweet boxes doesn’t have to be complicated or time-consuming. In fact, it can be a fun and rewarding creative process that adds a personal touch to your packaging. So, grab your decorating supplies, and let’s dive into some step-by-step decorating guides that will make your sweet boxes truly special.
1. Choose Your Theme and Color Scheme
Before you start decorating, it’s essential to have a clear theme and color scheme in mind. Think about the event or occasion for which the sweet boxes are intended. Are you creating boxes for a wedding, a baby shower, or a birthday party? The theme will guide your decoration choices.
Once you have your theme, select a color scheme that complements it. Consider the colors of the event or the recipient’s preferences. For example, if it’s a beach-themed wedding, you might opt for soft blues and sandy neutrals. Having a clear theme and color palette will ensure your decorations are cohesive and visually pleasing.
2. Gather Your Decorating Supplies
Now that you have a theme and color scheme in mind, it’s time to gather your decorating supplies. Depending on your chosen style, you may need items like ribbons, bows, stickers, stamps, washi tape, or even fabric scraps. Don’t forget to have scissors, glue, and any other necessary adhesives on hand.
Consider using a craft organizer or caddy to keep your supplies organized and easily accessible. Having everything in one place will save you time and make the decorating process smoother.
3. Create a Decorating Plan
Planning your decoration layout is like mapping out a treasure hunt. It adds excitement and ensures everything fits harmoniously. Lay out the empty sweet boxes and visualize where each decoration will go. This step-by-step guide will help you achieve a balanced and aesthetically pleasing design.
Start with the central element, such as a ribbon or a custom stamp, and work your way outward. Consider layering decorations for depth and dimension. For example, you can wrap a ribbon around the box and top it with a bow or a personalized label. Creating a plan will prevent over-cluttering and make your decorations pop.
4. Get Creative with Custom Stamps
Custom stamps are a fantastic way to add a personalized touch to your sweet boxes. You can have stamps made with your logo, a special message, or even an intricate design that complements your theme. Using ink pads in your chosen color scheme, stamp directly onto the boxes or onto separate pieces of paper or cardstock that you can attach.
For a playful touch, use stamps to create patterns or borders. Imagine sweet boxes adorned with tiny hearts or delicate swirls. Stamps are versatile, so let your creativity flow, and don’t be afraid to experiment with different colors and designs.
5. Perfecting the Art of Ribbon and Bow Tying
Ribbon and bows are classic decorations that never go out of style. They add a touch of elegance and charm to sweet boxes. To create a beautiful ribbon-tied box, follow these steps:
- Start by measuring the length of ribbon you need to wrap around the box.
- Cut the ribbon at an angle to prevent fraying.
- Wrap the ribbon around the box and tie it into a bow.
- Adjust the bow loops and tails for a polished look.
Experiment with different ribbon widths, textures, and colors to achieve the desired effect. For a sophisticated finish, consider adding a small decorative item, like a tiny faux flower or a personalized charm, to the center of the bow.
6. Embrace the World of Washi Tape
Washi tape is a versatile and fun decoration option for sweet boxes. It comes in various colors, patterns, and sizes, allowing you to get creative with your designs. Here’s how to use washi tape effectively:
- Select your desired washi tape(s) to match your theme.
- Measure and cut the tape to the desired length.
- Apply the tape to the box, smoothing it down to avoid air bubbles.
- Experiment with layering and creating patterns with different tapes.
Washi tape is also forgiving and can be repositioned if needed. It’s an excellent choice for adding colorful accents and geometric designs to your sweet boxes.
Adding a Personal Touch to Sweet Boxes: It’s All About You!
When it comes to gifting sweet boxes, it’s the personal touches that turn a simple gift into a heartfelt gesture. Let’s explore some fun and easy ways to add that extra dose of warmth and thoughtfulness to your sweet boxes.
1. Custom Labels: Your Words, Their Smile
Custom labels are like little love notes on your sweet boxes. You can create labels with personal messages, event details, or the recipient’s name. They’re easy to design and print at home or through professional services.
Imagine their delight when they see their name or a heartfelt message on the sweet box. It’s a simple yet impactful way to make them feel special and cherished. So, get your creative juices flowing and start designing those labels!
2. Photo Memories: Sweet Boxes with a Personal Twist
Want to take personalization to the next level? Consider adding a photo to your sweet boxes. Whether it’s a cherished memory of you and the recipient or a nostalgic moment, a photo adds a personal touch that tugs at the heartstrings.
You can print photos directly on the boxes or attach them using photo corners or adhesive. It’s like giving a sweet box filled with memories, and it’s bound to bring a smile to their face.
3. Handwritten Notes: The Power of Pen and Paper
In this digital age, there’s something incredibly intimate about a handwritten note. Take a moment to jot down a heartfelt message or a sweet wish on a small card. It adds a personal and human touch to your sweet boxes that no printed message can replicate.
Your handwritten note can be a simple “I love you” or a longer message expressing your feelings. It’s the kind of gesture that warms hearts and makes sweet boxes even sweeter.
4. DIY Decorations: Crafty and Personal
If you’re a craft enthusiast, this one’s for you! Create DIY decorations for your sweet boxes. Craft paper flowers, mini bunting, or tiny origami animals. These handmade touches show the recipient that you put thought and effort into their gift.
You can even involve your kids or friends in the crafting process, making it a fun and collaborative project. The result? Sweet boxes that are not only visually appealing but also filled with love and creativity.
5. Inside Jokes and Memories: Shared Laughter
Do you and the recipient share inside jokes or memorable moments? Incorporate them into your sweet boxes! It could be a small trinket that represents a funny memory or a hidden surprise that’s meaningful to both of you.
When they discover these little nods to your shared experiences, it creates a connection and an instant bond. It’s like reliving those moments all over again, making the sweet box a treasure trove of shared laughter.
6. Favorite Colors and Themes: Tailored to Their Tastes
Consider the recipient’s favorite colors, themes, or hobbies when personalizing your sweet boxes. If they love a particular color, use it for the ribbon, labels, or even the sweet box itself. If they’re into a specific theme, incorporate it into the design.
This thoughtful gesture shows that you know and appreciate their preferences, making the gift all the more special. It’s like creating a sweet box that’s uniquely designed just for them.
Decorating on a Budget: Sweet Boxes That Sparkle, Not Spend
You don’t need a Hollywood budget to make your sweet boxes shine. Let’s uncover some budget-friendly decor tips that will have you decorating like a pro without breaking the bank!
1. Think Outside the (Sweet) Box
When it comes to budget-friendly decor, start by thinking outside the sweet box, quite literally. Look around your home for materials you already have. Have some leftover fabric from a previous project? Use it to wrap your sweet boxes. Found a stash of old ribbons? They can become beautiful bows.
By repurposing items you already own, you not only save money but also add a touch of eco-friendliness to your sweet boxes. Plus, it’s a creative challenge that’s surprisingly satisfying!
2. Paper Magic: Crafty and Cost-Effective
Paper is your budget-friendly friend when it comes to decorating sweet boxes. Think about using colorful scrapbook paper or even old maps or sheet music. These papers often come in varied patterns and can add a unique and personalized touch to your sweet boxes.
You can also create paper rosettes, flowers, or mini flags to adorn your boxes. It’s a low-cost way to add depth and dimension to your decorations without skimping on style.
3. Dollar Store Finds: Hidden Treasures
Don’t underestimate the power of the dollar store when it comes to budget-friendly decor. You’d be surprised at the gems you can uncover there. Look for ribbons, stickers, tiny ornaments, or even small figurines that can be repurposed for sweet box decorations.
You can also find affordable craft supplies like glue, scissors, and colored paper. By shopping smart at the dollar store, you’ll stretch your budget and discover new possibilities for your sweet box decor.
4. DIY Stamps: Your Personal Imprint
Creating your own custom stamps is easier and more budget-friendly than you might think. All you need is a simple carving block, a carving tool (which can be found at craft stores), and your creative vision.
Carve your design onto the block, apply ink, and stamp away! It’s a fun DIY project that allows you to personalize your sweet boxes with custom designs without splurging on professional stamps.
5. Washi Wonders: Colorful and Affordable
Washi tape is a budget decorator’s dream. It’s colorful, versatile, and budget-friendly. You can find a wide variety of washi tape in different colors and patterns, often at a fraction of the cost of other decorative materials.
Use washi tape to create patterns, borders, or even cover the entire sweet box. It’s an easy way to add a pop of color and personality without the hefty price tag.
6. Minimalism with Maximal Impact
Sometimes, less is more. Embrace the beauty of minimalism by using a single, striking decoration on your sweet boxes. A simple ribbon, a sprig of greenery, or a small, meaningful charm can speak volumes without overwhelming the design or your wallet.
Minimalistic decorations not only save you money but also create an elegant and sophisticated look that’s perfect for various occasions.